Meshtastic has taken off in my hometown. After my first post detailing the build of my first Meshtastic node and chatting with new users in the area, I decided to continue “investing” into our network, especially as I live in a high-rise apartment with access to outdoor stairwells, I have an excellent line of sight view of the city.
Assembly
There are quite a few awesome solar nodes on Reddit, many of them hacked into the enclosures of solar-powered outdoor LED lights. While many of these probably function and look fine, I’ll be honest: I didn’t want to take the risk that the solar panel or batteries couldn’t power the node long-term. I’d rather spend a little more money for a purpose-built case than possible have to hunt down and gut parts of questionable quality.
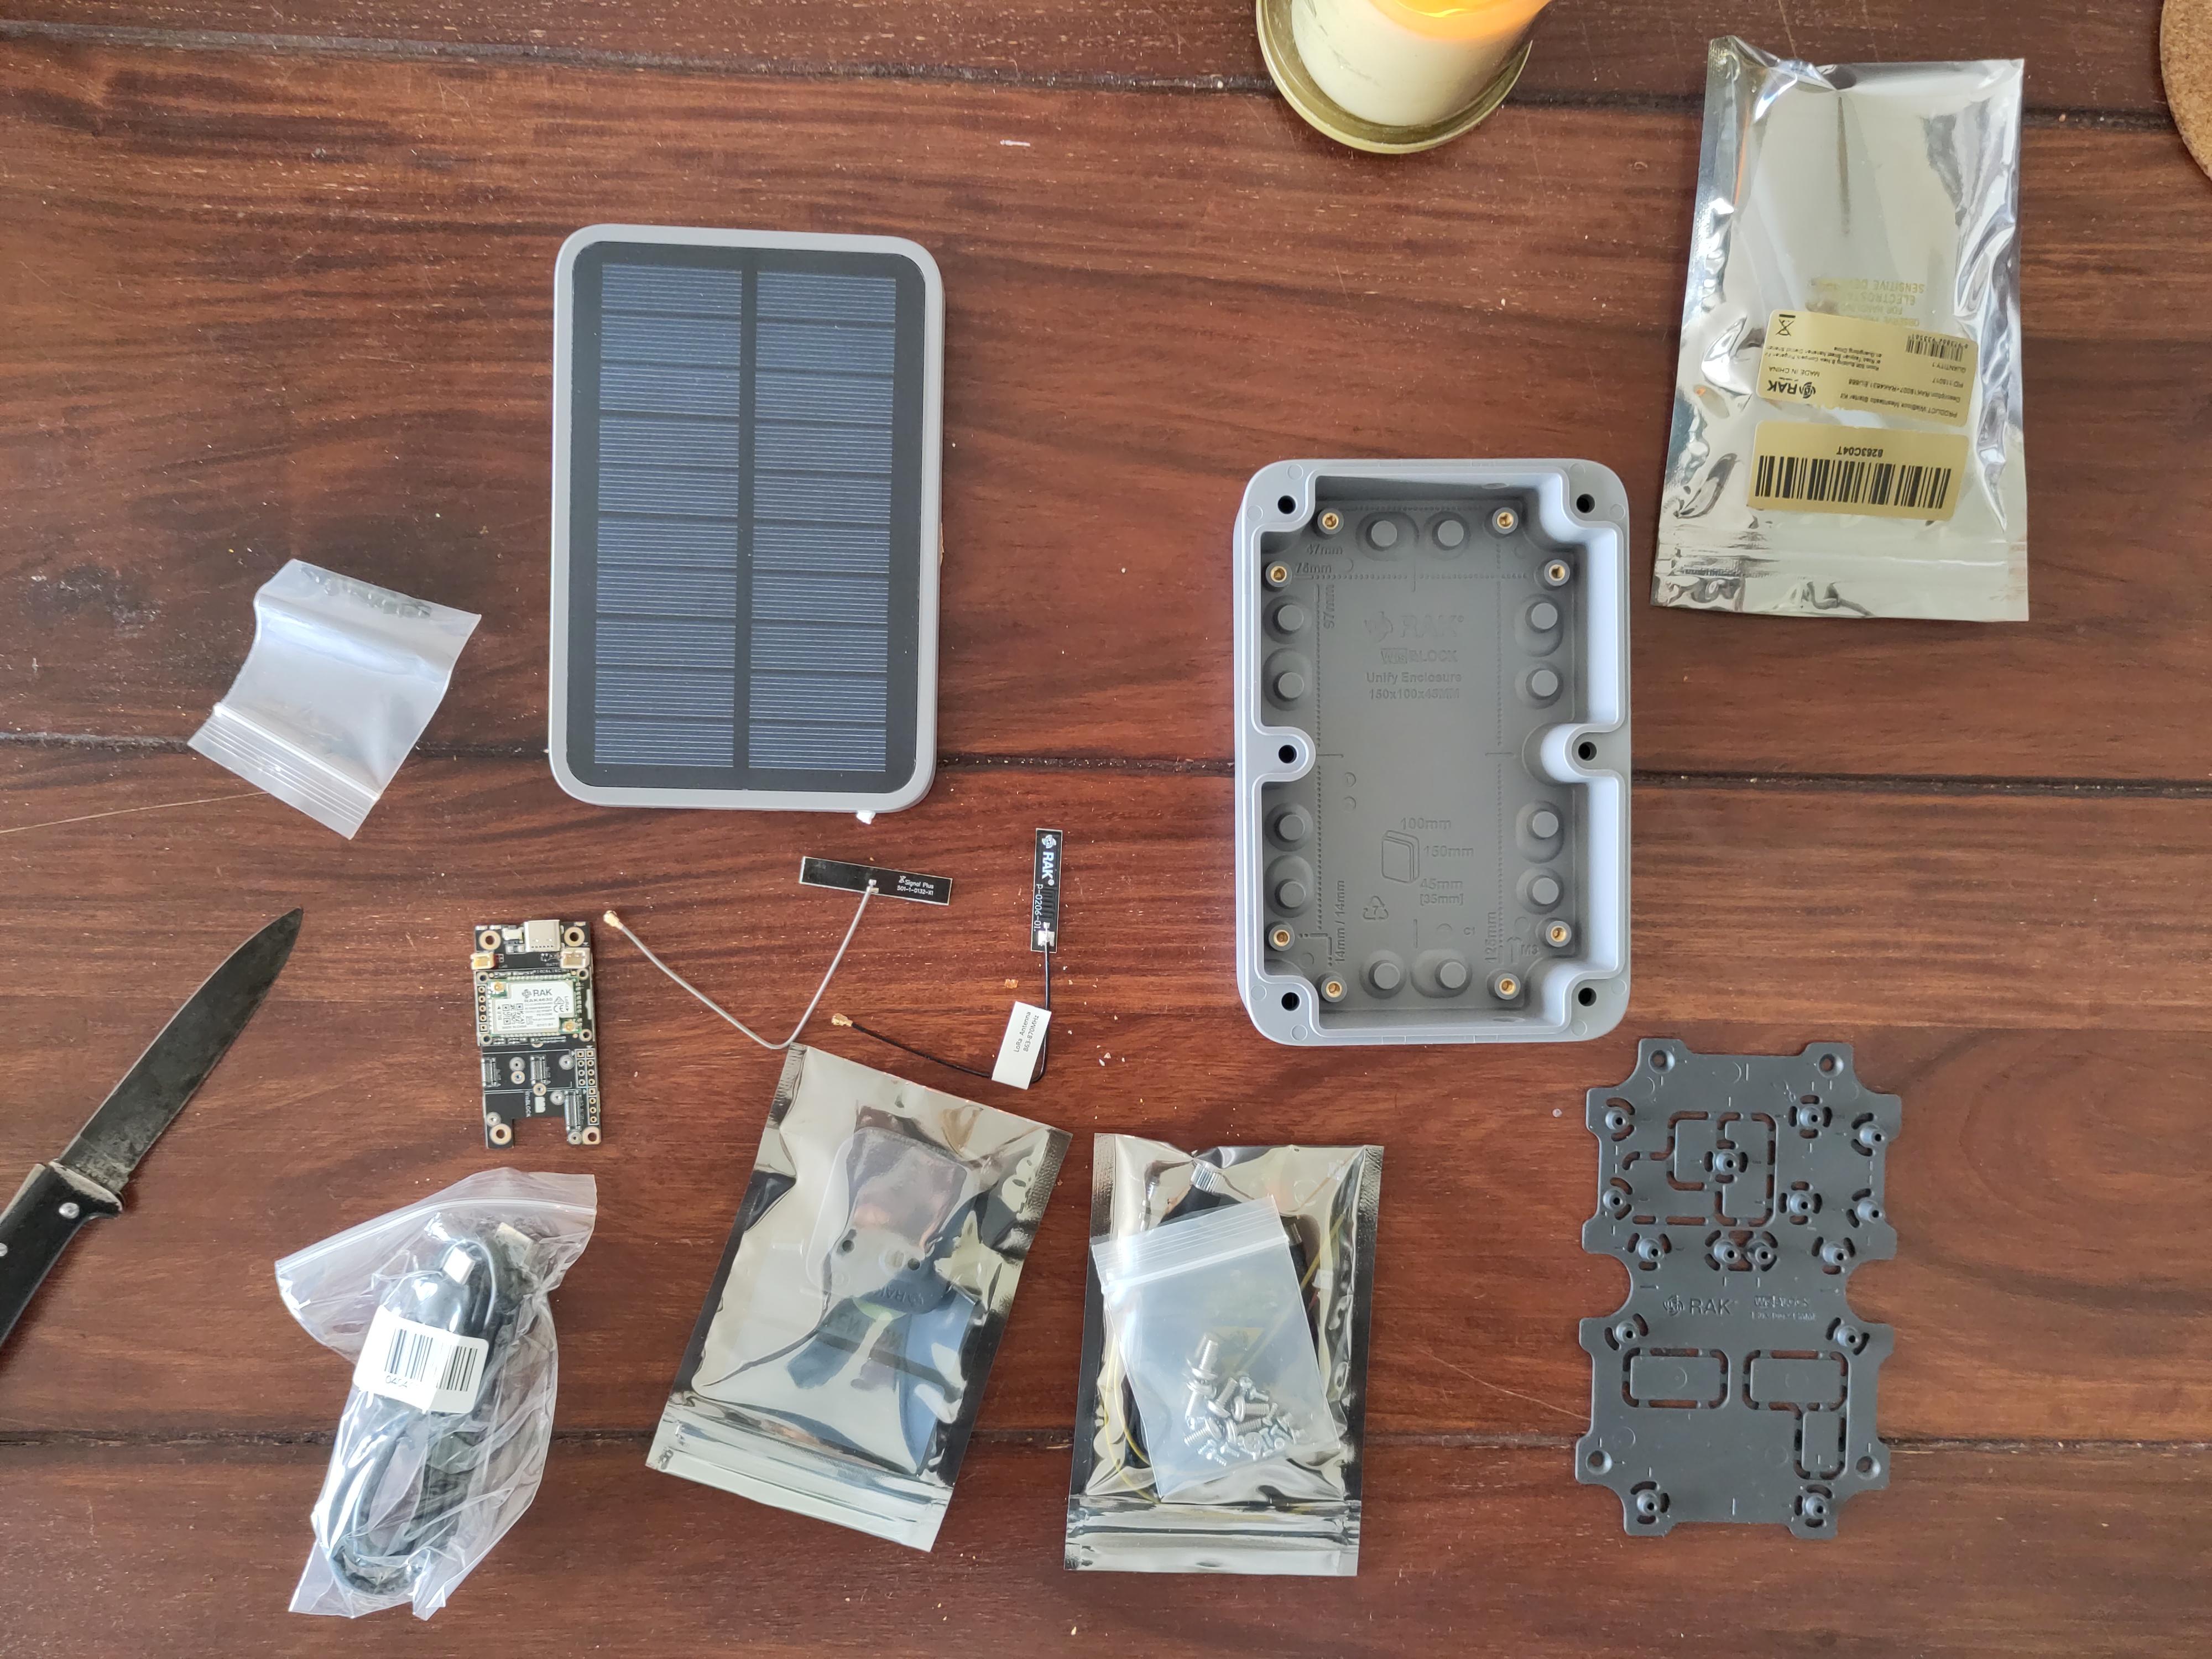
RAK components laid out.
The bottom bags contain screws and the magnet mounting parts, the top right the actual RAK4631 core module.
As such, I decided to order nearly all parts directly from RAKWireless directly. This includes:
- Unify Enclosure IP67 150x100x45mm with the Unify Magnet Mounting Kit (Type G)
- WisBlock Meshtastic Starter Kit
- Generic 868Mhz high-gain antenna
- 4000mA LiPo battery.
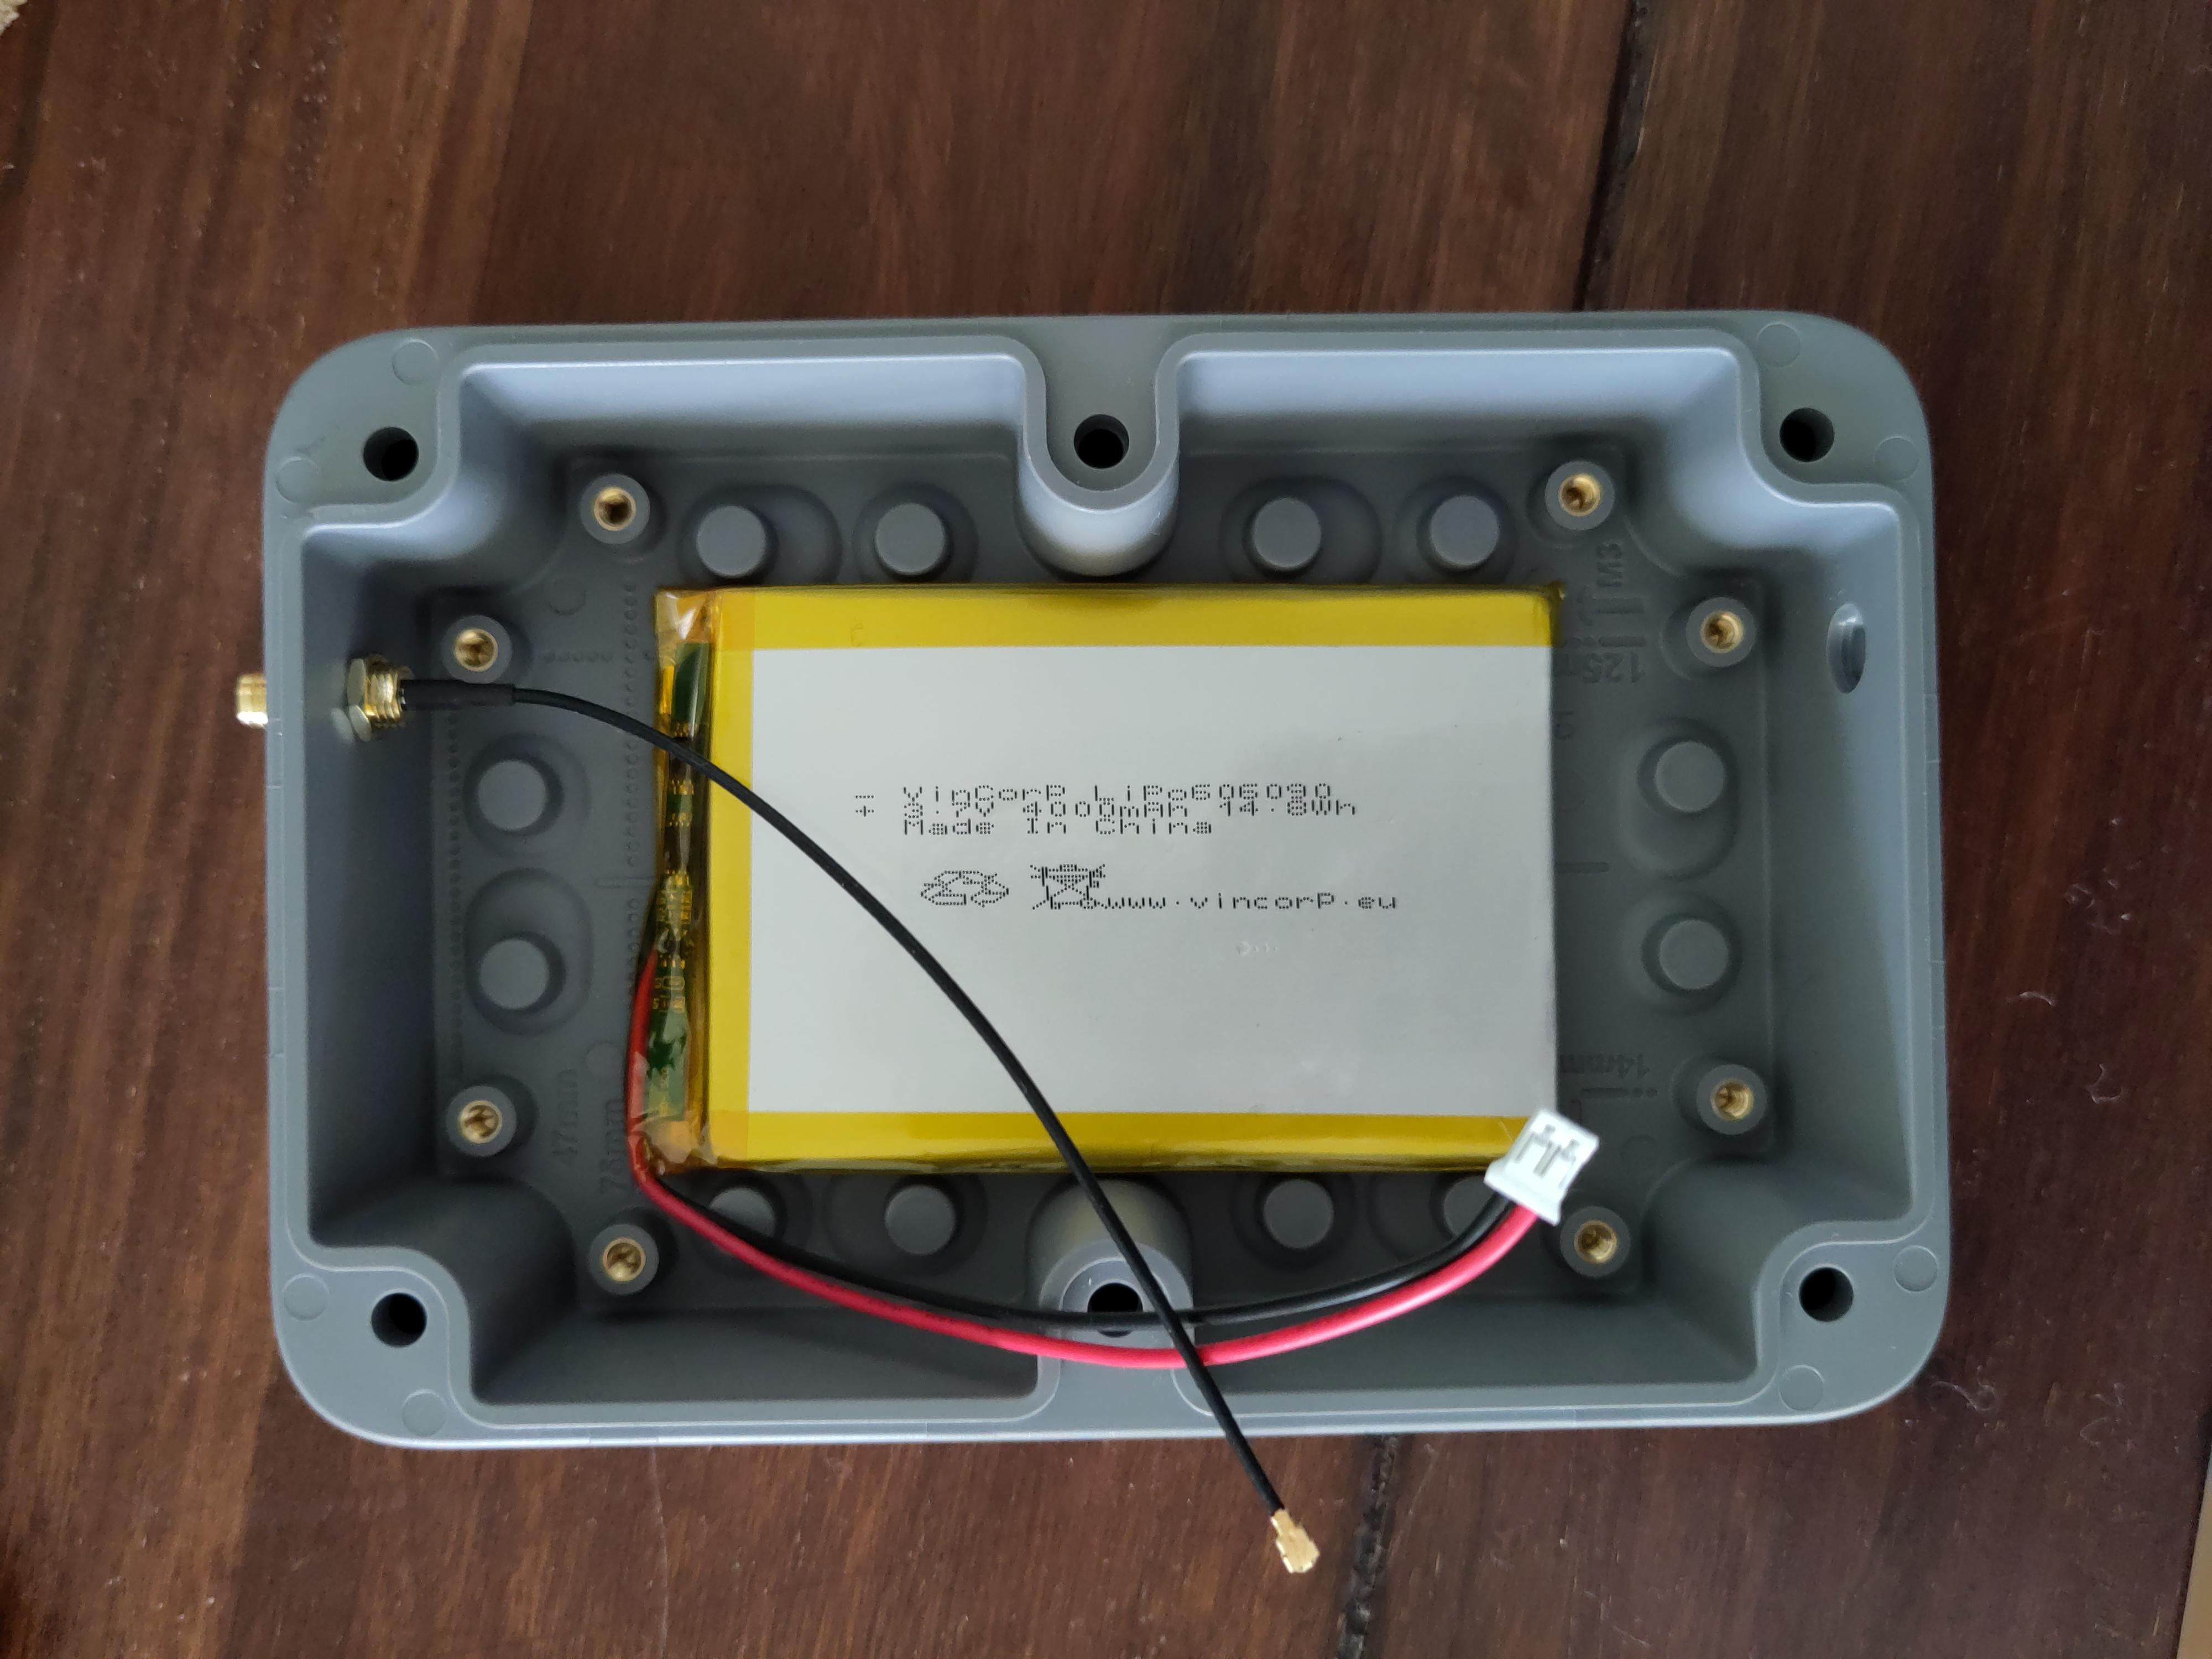
Battery Installation
The 606090 LiPo fits perfectly.
Assembling the device is relatively straightforward: place the battery inside the case, install the RAK4631 module(s) on the mounting plate, mount the plate over the battery, then attach all antenna cables.
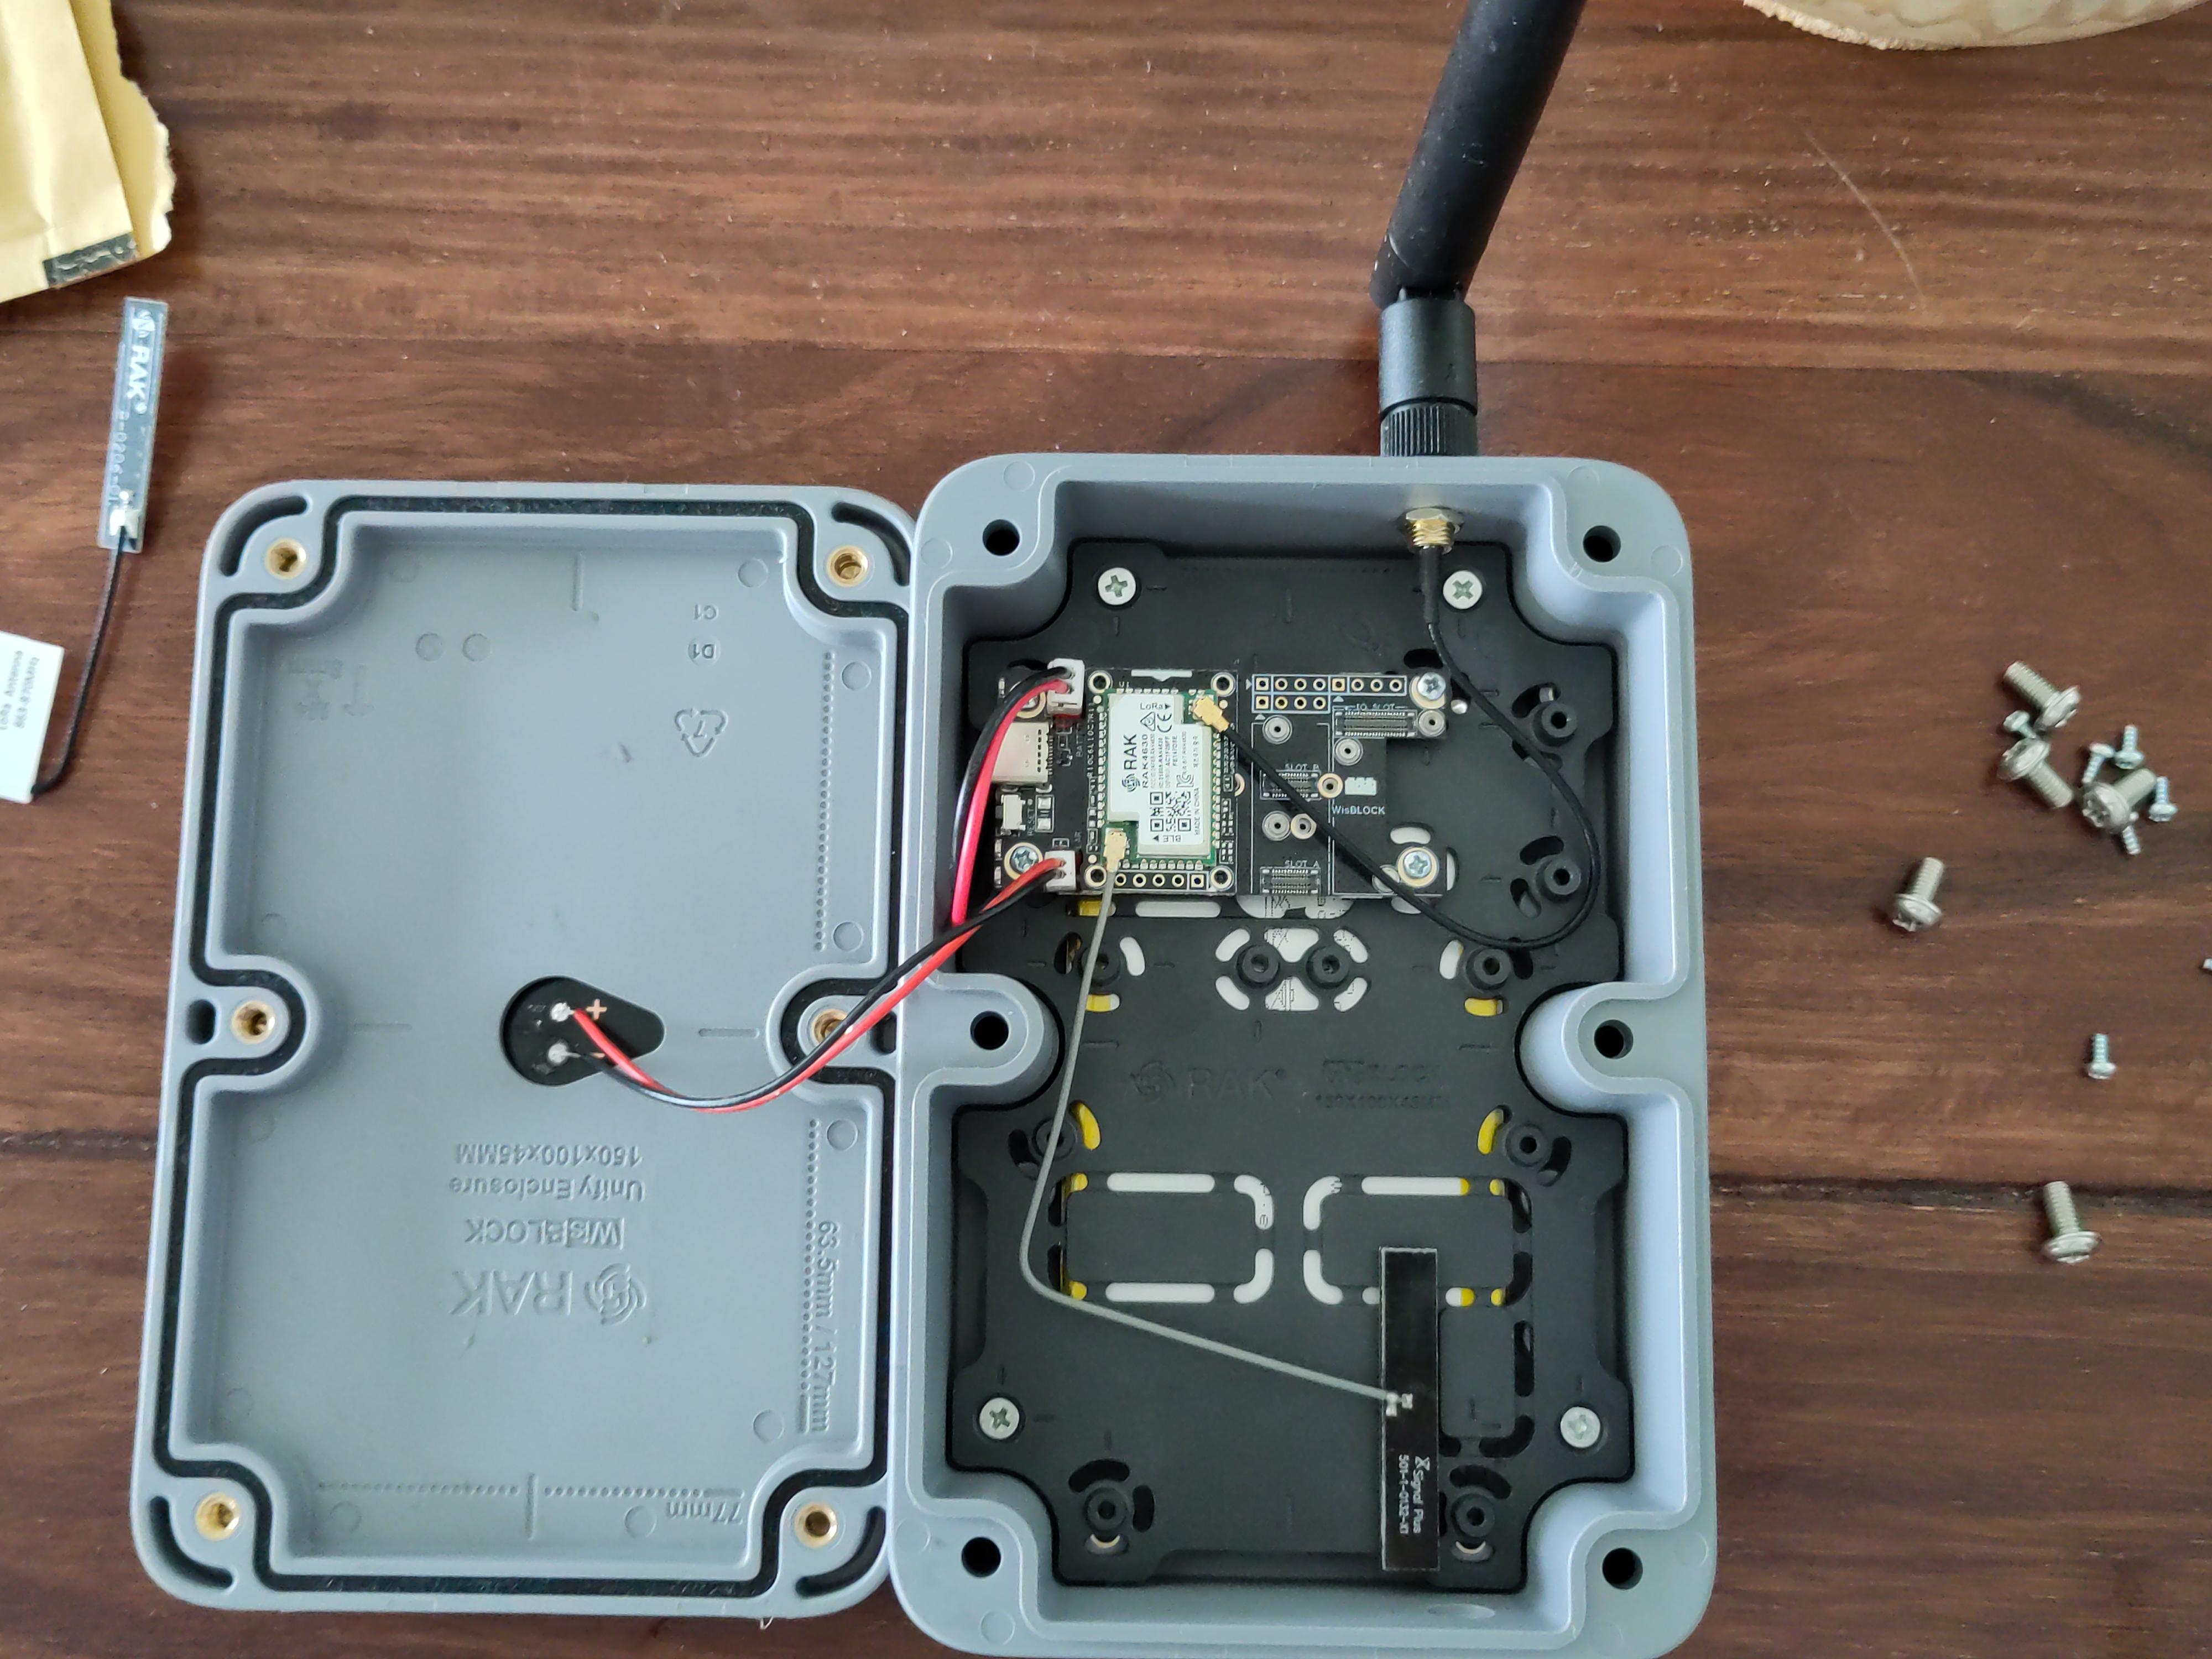
Complete internals of the device
Note the large amount of space for other components, such as GPS trackers.
The front of the case containing the solar panel seals the internals of the device by screws on the back.
Finding the Optimal Spot
The high-rise apartment I currently live in certainly has its benefits — such as a direct view of my city’s skyline. Still, the device requires ample amounts of light to operate. While all residents of my complex have roof acces, I would prefer to keep the node out-of-view from shared spaces. Unfortunately, some of the metal trimmings around the roof are made of aluminium or some other non-magnetic metal. As such, I had to keep exploring for placement spots.
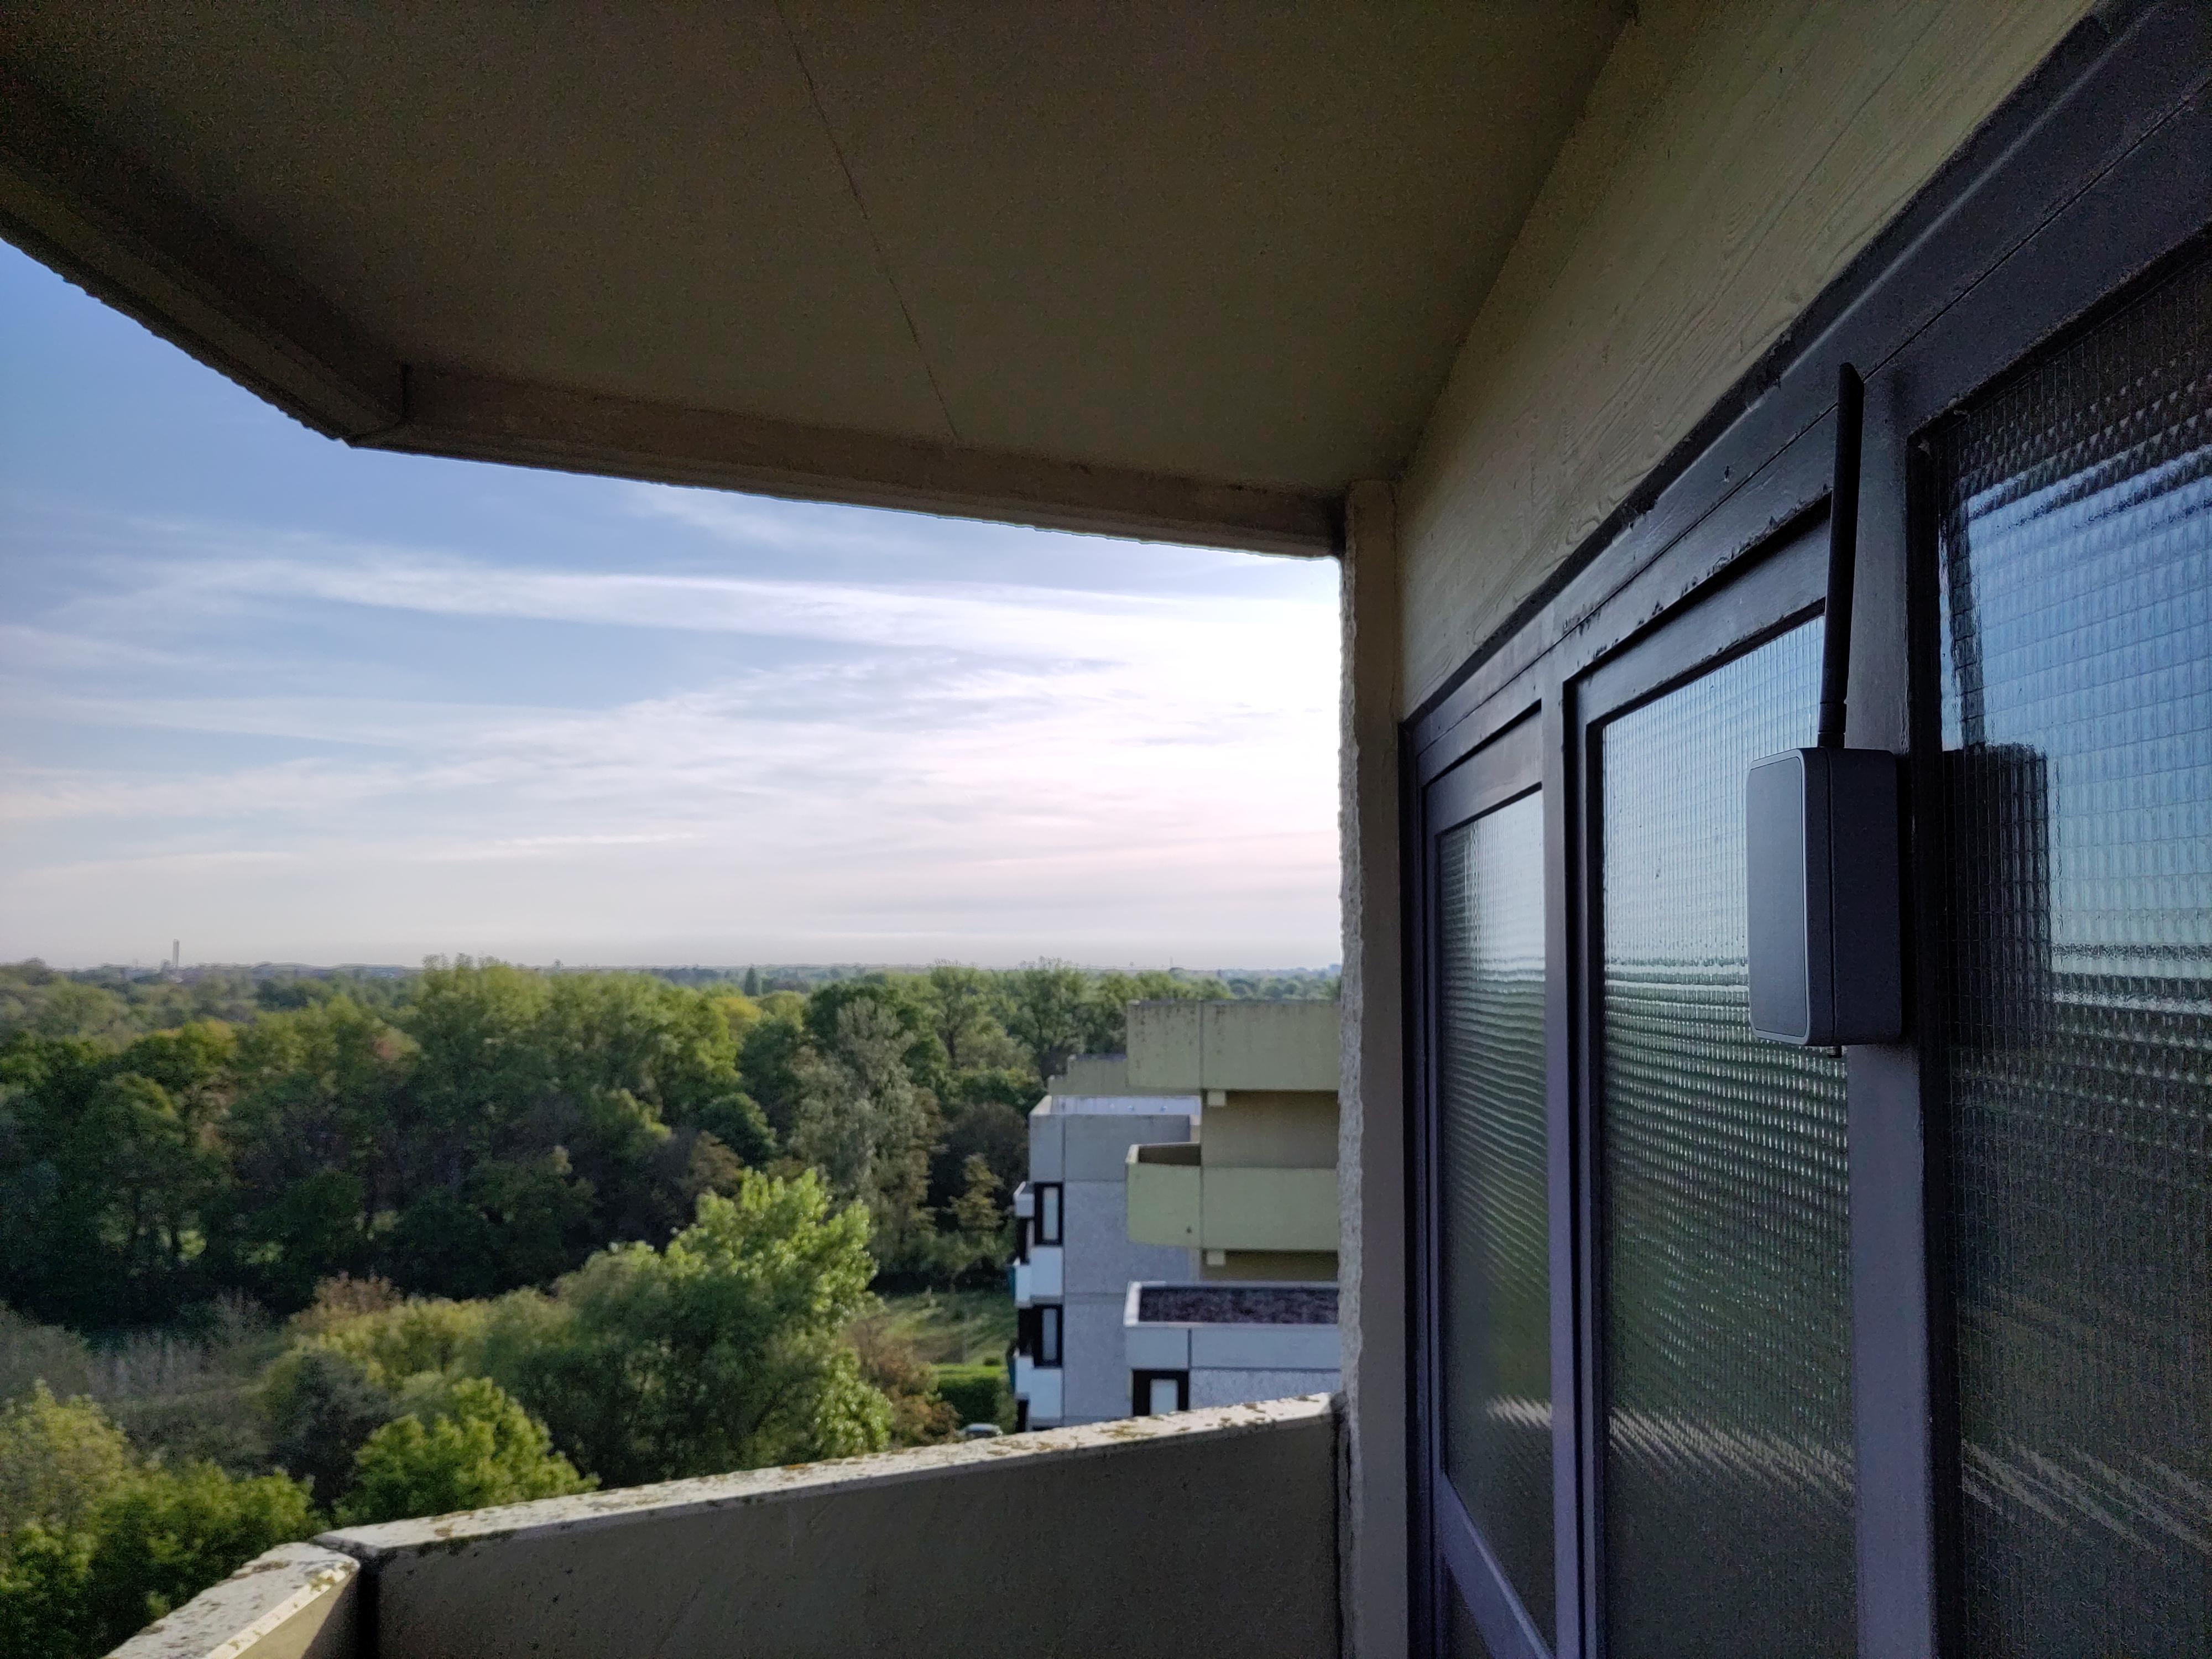
The installed node
With a clear view of Hannover’s eastern horizon
Fortunately, our apartment building has a somewhat convoluted staircase system. While the staircase that connects all stories is fully indoors, one has to leave and go around an outdoor balcony to access the residential floor. While exploring, I noticed that the staircase for the hightest apartmentm the penthouse, continues up to another floor! Taking the last “balcony” leads to the locked door of the elevator maintenance room. Nobody is ever there, aside from maintenance contractors (and, judging by some litter, teenagers). This is the ideal spot to install my node — little foot traffic and the highest possible vantage point.
Range Test
- I have my first RP2040-based node installed in the attic of my Studentenverbindung in Hannover’s Calenberger Neustadt, a north-western neighborhood near the city center. These nodes establish a persistent connection at around 4.2 km (2.6 miles). This centrally-located node can continue to forward messages from the more central and northern parts of the city.
- Under proper conditions I can connect with the node from my T-Echo when I’m at work, located in the far-eastern part of the city, behind the Eilenriede municipal forest. This is a whopping 7.5 km (4.7 miles)!
Needless to say, LoRa can achieve even better ranges, but this outstanding, considering there hundreds of buildings and trees and other infrastructure of the city in the way. I’m excited to see how long this node can run without maintenance or repositioning.